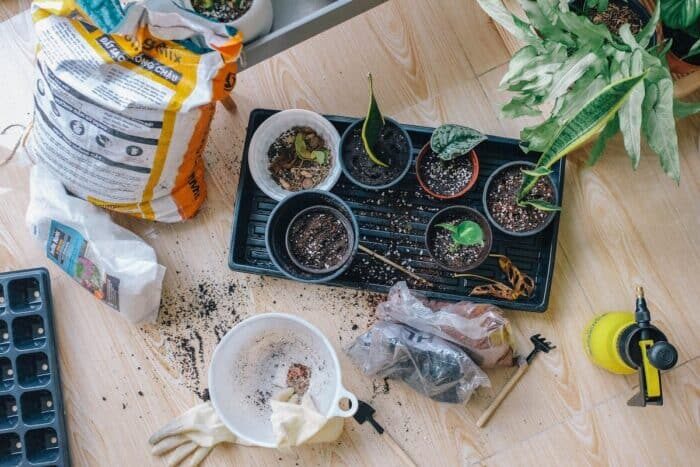
Adept of green spaces and beautiful flowers, do you wish to give your camellia a new lease on life? The success of this operation depends on various factors, among which the right time to repot, the choice of the pot, the realization of an adequate soil mix, as well as the implementation of appropriate post-repotting care. This guide will provide you with a step-by-step approach to successfully repot your camellia, whether you are a beginner or an experienced gardener. Let’s delve into the world of gardening and discover the secrets of a successful repotting.
The repotting of camellia is a delicate operation, but crucial to ensure the flourishing of this splendid plant. To carry it out successfully, there are several steps to be meticulously followed.
First, selecting the appropriate pot is essential. It must be large enough to accommodate the roots of your camellia while ensuring good drainage. Therefore, choose pots with drainage holes and spacious enough to allow the plant to grow healthily.
Secondly, carefully prepare the potting mix that will nourish your camellia during its new phase after repotting. This mixture should be well-draining and rich in essential nutrients for the harmonious development of the camellia.
Thirdly, do not forget that pruning before repotting is also vital to eliminate dead or diseased branches that could weaken the plant during its post-repotting recovery.
Next comes the crucial step: the actual repotting of the camellia. Be particularly gentle during this operation and ensure that the roots are properly positioned in their new environment filled with fresh soil.
Once these different phases have been carried out with care, you will need to regularly take care of the young tree in its new home. A moderate watering (without excess) will be necessary for a few weeks after repotting, as well as supplementary feeding with specific fertilizers for camellias intended to stimulate their growth.
With special attention during the camellia repotting process and adequate maintenance thereafter, your shrub will continue its generous blooming year after year. This ultimate reward represents all the beauty inherent in gardening: seeing your efforts translate into vibrant buds picked directly from our gardens.
When it comes to choosing the right container for the repotting of your camellia, it is important to pay special attention to certain aspects. The size of the pot is a key element to consider. It must be spacious enough to allow the roots to develop freely and avoid any suffocation.
The material of the pot also plays an important role in the success of the repotting. Terracotta pots are often preferred as they provide better air circulation and thus allow the roots to breathe properly. Their porosity promotes better drainage of water, thus avoiding the risks of waterlogging that could harm your camellia’s health.
It is also recommended to use pots with drainage holes so that water can easily flow out during watering. This will help maintain a balanced moisture level in the substrate without creating excess that could lead to root rot.
As for the substrate itself, it is important to choose the right mix. A mixture composed of blonde or brown peat, horticultural soil and/or composted bark can be a good option.
Once you have chosen the right container and the suitable substrate, it is time to proceed to the actual repotting. For this, gently remove your camellia from its old pot, being careful not to damage the fragile roots. Then place it in the new pot, gradually adding the substrate around the roots, lightly compacting it to ensure good stability.
Don’t forget to water generously your camellia after repotting to help it establish itself in its new environment. However, be careful not to leave standing water in the pot’s saucer to avoid any risk of rot.
By following these tips and carefully choosing the appropriate container during the repotting of your camellia, you provide it with the best conditions to fully thrive and beautify your garden with its magnificent flowers.
When it comes time to prepare the ideal soil mix for repotting your precious camellia, it is essential to adopt a meticulous and thoughtful approach. The composition of the substrate plays a crucial role in the health and harmonious growth of your plant.
To start, opt for a well-draining soil that will allow the camellia’s roots to breathe properly. A good choice would be to combine elements such as blonde or brown peat with richly composted horticultural soil and decomposed bark.
Peat, with its ability to retain moisture while ensuring good aeration, will promote healthy root development. The horticultural soil will provide the essential nutrients necessary for the vigorous growth of your camellia. As for the composted bark, it will help improve soil drainage by preventing excessive water accumulation.
It is also possible to enrich this mix with organic amendments such as compost or well-decomposed manure to provide your camellia with all the nutrients it needs to fully develop.
However, be careful not to overload the substrate with organic matter as this could lead to excessive nitrogen accumulation, thus affecting the nutritional balance necessary for your plant’s proper development.
Once you have carefully prepared this camellia-adapted mix, gradually fill the new pot while being careful not to damage the fragile roots during transplantation.
Ensure that the substrate is well compacted around the roots to promote good stability and optimal contact between the roots and the soil.
By following these recommendations, you provide your camellia with all the necessary conditions to thrive in its new container. Be sure to provide it with regular watering but without excess to maintain adequate moisture without risking soil saturation.
Caring for a camellia may seem delicate, but with this meticulous preparation of the soil mix, you allow your plant to express all its beauty in your garden. Therefore, do not neglect this crucial step of repotting, which greatly conditions the health and flourishing of your camellias.
When it comes to carefully preparing your camellia before repotting, it is crucial to pay special attention to certain aspects. Ensure that the plant receives adequate exposure to sunlight. The camellia, while it enjoys shaded areas, needs to receive a sufficient amount of light for optimal growth and flowering.
Before proceeding with the actual repotting, carefully examine the overall condition of your camellia. Look for any signs of infection or potential disease such as spots on the leaves or brittle branches. If you notice anything abnormal, it is advisable to consult a gardening professional for expert advice.
Once these checks have been carried out rigorously and precisely, you can move on to the delicate process of the actual repotting.
Gently remove the camellia from its current pot, acting gently so as not to damage its fragile roots. If necessary, lightly tap the sides of the pot to help the root ball detach more easily.
Carefully place the camellia in its new pot prepared earlier, ensuring that it is centered and upright in the container.
Once your camellia is in place in its new pot, gradually fill the empty space with the soil mix prepared earlier. Lightly compact the soil around the roots to ensure good contact between them and the new soil.
Water your newly repotted camellia generously to promote adequate hydration of the roots. Ensure that water flows freely through the pot’s drainage holes to avoid any risk of excessive water accumulation.
From there, you will need to regularly care for your camellia by providing appropriate watering according to its needs while closely monitoring its overall condition. Do not hesitate to make frequent observations and provide the necessary care to maintain its optimal health.
By adhering to the above recommendations with diligence and attention, you provide your camellia with all the ideal conditions to thrive in its new environment. By cherishing this beautiful plant with love and expertise, you will be rewarded with its radiant beauty that will illuminate your garden for many years to come.
The repotting of a camellia is a delicate operation that requires special attention. In this section, we will guide you step by step to carefully carry out the repotting of your camellia.
Choose a pot suitable for the current size of your camellia and consider its future growth. Opt for a container that is slightly larger than the previous one to allow the roots to develop properly. Also, ensure that the pot has drainage holes to avoid any excess standing water.
Before proceeding with the repotting, prepare an appropriate soil mix for your camellia. It should be well-draining and rich in organic matter. You can add compost or fine bark to improve the soil structure and promote root aeration.
Once these preparations are complete, move on to the next step: gently remove your camellia from its old pot, being careful not to damage the fragile roots. If necessary, lightly tap the sides of the pot or use a clean knife to gently detach the root ball without damaging the roots.
Then carefully place the camellia in its new pot, ensuring that it is centered and upright. Gradually add the soil mix around the roots, lightly compacting it to avoid air pockets.
Next, be sure to water your newly repotted camellia generously to ensure adequate hydration of the roots. Water should be able to flow freely through the pot’s drainage holes. This will help eliminate any excess salt or fertilizer that may have accumulated in the soil.
After repotting, keep a close eye on your camellia and observe its adaptation to its new environment. Be sure to maintain regular watering, while avoiding excess water that could lead to root rot.
You must provide the camellia with adequate exposure to sunlight. Whenever possible, place it in a spot where it will receive filtered or indirect light for most of the day.
By following these recommendations carefully and being attentive to the specific needs of your camellia, you will provide it with the best conditions to fully thrive in its new pot. Be sure to regularly monitor the overall condition of your plant and adjust your care as necessary.
The repotting of a camellia requires attention and meticulousness to ensure its good health and abundant flowering over the years.
Once you have completed the repotting of your camellia, you need to water your camellia after repotting:
Regular watering: Maintain regular watering to ensure adequate hydration of the roots. Be careful not to let the soil dry out completely between waterings, but also avoid any excess water that could lead to stagnation and root rot.
Moderate fertilization: After repotting your camellia, wait about a month before starting to fertilize. Use a balanced fertilizer specific to acid-loving plants such as camellias. Apply the fertilizer according to the manufacturer’s recommendations and avoid any over-fertilization that could burn the roots.
Protection from the elements: If you have repotted during a period of extreme temperatures or in the presence of strong winds, consider temporarily protecting your camellia with a winter cover or placing the pot in a sheltered location.
Light pruning: If necessary, carry out light pruning of your camellia after repotting to remove any dead or misaligned branches. However, avoid drastic pruning that could further stress the newly repotted plant.
Monitoring for pests and diseases: After repotting, keep a close eye on your camellia for any signs of pest infestation or disease. If you notice yellowing, spotted, or deformed leaves, consult a professional who can advise you on the measures to take.
Protection from frost: If you live in an area where winter temperatures are low, make sure to protect your camellia from frost during the cold season. Use winter covers or move it to a sheltered place such as a greenhouse until the risk of frost has passed.
By following these practical tips after the repotting of your camellia, you will maximize your chances of successfully completing this delicate operation and provide your plant with all the necessary conditions to fully thrive. Remember to regularly observe the overall condition of your camellia and adjust your care as necessary to ensure its good health and longevity.